Tokenizer and Sentence Boundary Detector Service
From WebLichtWiki
This tutorial presents a workflow for creating a webservice for TCF processing. It shows a basic tokenizer and sentence boundaries detector service. The service processes POST requests containing TCF data with a text layer. It uses the text from the text layer to produce token and sentence annotations.
This web-service imitates the case when its processing tool object is not expensive to create and it does not consume a lot of memory. In such a case the best way is to create the tool object with each client POST request, as shown in the service implementation.
This web-service also demonstrates two ways of returning the TCF output in HTTP response: as a streaming output and as an array of bytes. Both ways have their advantages and disadvantages. In case of returning bytes array the implementation is simpler, but the whole output TCF is hold in memory at once, so in case the TCF output is big, the server might run out of memory. In case of returning streaming output the implementation is slightly more complicated, but TCF output is streamed and only a part of the output is hold in memory at a time. This makes it possible to handle TCF output of bigger size.
Contents |
Prerequisites
The tutorial assumes you have the following software installed:
- NetBeans IDE 7.2.1
- wget or curl command line tool (optional)
Adding Clarin Repository
The example WebLicht Service is provided as Maven Archetype stored in Clarin Repository. Therefore, you'll need to add Clarin Repository to your list of Maven Repositories. Skip this step if Clarin Repository is already among your Maven Repositories.
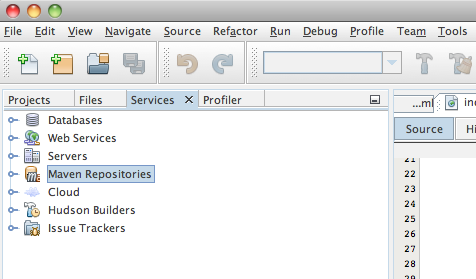
In NetBeans IDE, go to the list of Maven Repositories under the Services tab:
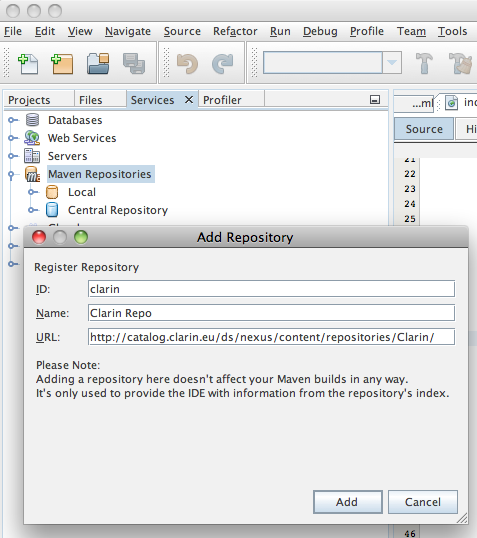
Right-click on "Maven Repositories" and select "Add Repository" option. Fill in the following information in the "Add Repository" window:
- Repository ID: clarin
- Repository Name: Clarin Repo
- Repository URL: http://catalog.clarin.eu/ds/nexus/content/repositories/Clarin/
Finish by pressing "Add"
Creating a Project from an Archetype
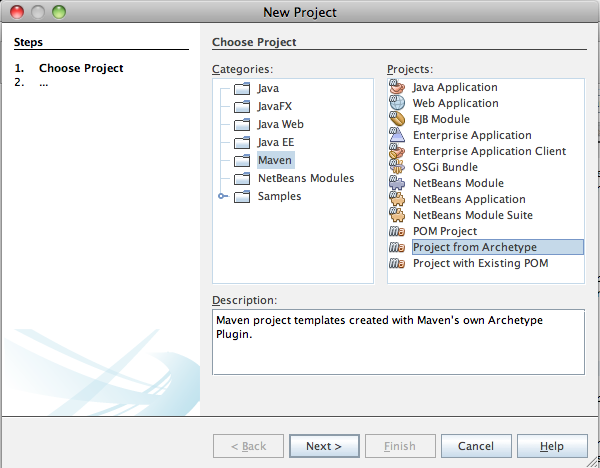
Once the Clarin Repository is accessible, we can start using the archetype at once. Press the "New Project" button in the menu bar and select: Maven -> Project From Archetype
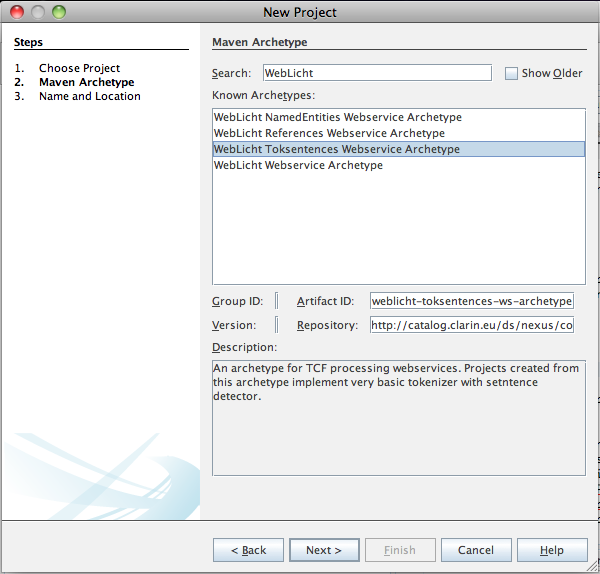
In the next screen find and select "WebLicht Toksentences Webservice Archetype"
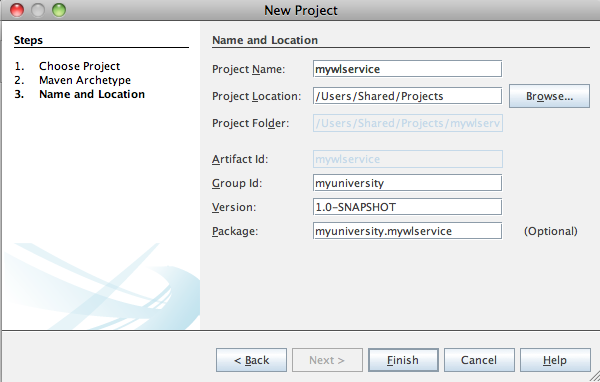
Provide a name for your project, a directory to store it in as you would normally do with any NetBeans project. In addition, you have a possibility to provide a group name for your maven artifact and a package name you would like to use.
That's it! You have just created a WebLicht webservice.
Testing Webservices
The most straightforward way to test a webesrvice is to use wget command line tool:
wget --post-file=input.xml --header='Content-Type: text/tcf+xml' http://localhost:8080/myfirstwebservice/mytool
Make sure you actually have a file named "input.xml" in the current directory. This file is located under "Web Pages" in your project, just copy it to your current directory.
What's next?
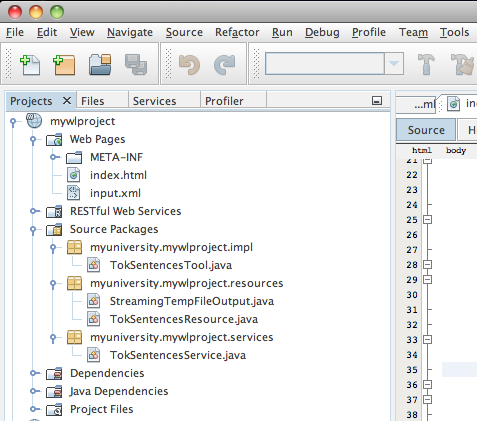
Of course you would probably like to customize the provided code. Let's take a look at the files we have in the project:
- MyService.java - is the application definition, use it to define the path to your application and/or add more resources.
- MyResource.java - is the definition of a resource, in case more resources are required you can use it as a template for any further resources. (Don't forget to add them to the MyService.java)
- MyTool.java - is the place where an actual implementation of a tool resides. In this template a simple tokenizer implementation is provided.
